
If your website takes more than 2 seconds to load, you risk chances of increasing your bounce rate. While optimizing images is one of the tips for improving WordPress website speed, there are other advanced techniques to use. As a backend web developer, you can make changes to the code to increase website speed.
This guide is a continuation of speeding up your WordPress site (Part One). So, if you’ve not checked the first part, consider checking it out. For this article, we’ll look at the following techniques:
- How to improve database performance
- Make use of a CDN
- Offload email and media
Let’s get started!
Improve Database Performance

We’ll go over how to optimize your WordPress database. Your database, just like a car, needs maintenance to avoid becoming overloaded in the long run.
Membership sites are particularly challenging since they typically generate more complicated queries, which adds to the latency of receiving data from the MySQL database. The reason for this is due to the many moving components and enormous volumes of data that these sites have. Sites that extensively depend on search queries for navigation or employ WP Query could also be to blame.
This is on top of the fact that a huge number of users are querying the database at the same time.
Make Use of MySQL’s InnoDB Storage Engine
Many outdated websites still use the MyISAM storage engine. On the other hand, InnoDB has demonstrated better performance and reliability in recent years.
InnoDB has several advantages over MyISAM, including the following:
- Row-level locking is available in InnoDB. Only full table-level locking is available in MyISAM. This helps your queries to run more quickly.
- Referential integrity is a feature of InnoDB that includes support for foreign keys (RDBMS) and relationship constraints, which MyISAM lacks (DMBS).
- Transactions are supported by InnoDB, thus you can commit and roll back. MyISAM, on the other hand, does not.
- Because it employs transactional logs for auto-recovery, InnoDB is more dependable. MyISAM, on the other hand, does not use this.
You’re probably wondering if you’re using InnoDB or MyISAM. If you’re using WordPress for the first time, you’re likely already utilizing the InnoDB MySQL storage engine. However, if you have an older WordPress site, you should perform a quick inspection. Many sites may even have tables that are a combination of InnoDB and MyISAM, which could benefit from conversion.
To check, follow the instructions outlined below.
- Sign in to your phpMyAdmin account. Then select your MySQL database.
- You can determine the storage engine categories the tables utilize by scanning or sorting the “Type” column.
It’s time to migrate your MyISAM tables to InnoDB if you find any. Asking your host whether they can handle this task is always a good idea.
Revisions to Pages and Posts Must Be Removed Or Restricted
A revision is created every time you save a WordPress post or page. This happens in both revised posts that have previously been published as well as drafts. If you’re required to go back to an earlier iteration of your work, revisions can be helpful.
Revisions, on the other hand, can reduce your WordPress site’s speed. On larger websites, this can quickly add up to thousands of unnecessary entries in your database. The more entries your database has, the heavier it is, requiring more storage. Even though indexes were developed expressly for this reason, we’ve seen this problem wreak havoc on WordPress sites. Fortunately, you have some options to address this.
Remove Previous Revisions
It’s advisable to undertake a fast cleanup. Remove previous revisions if your WordPress site is older and has many posts and pages. You can accomplish this using MySQL. However, given the amount of malicious code on the internet, we advocate backing up your website and adopting free plugins such as WP-Sweep.
Our other recommended plugin is WP Rocket. It includes an option for optimizing your database that clears out revisions.
If you’re familiar with WP-CLI, you can perform a few commands to accomplish this.
- To view and check the quantity of revisions present in the database, log in to your server through SSH and perform the following command: wp revisions list.
- If an error occurs, run the following command to install the wp-revisions-cli package: wp package install trepmal/wp-revisions-cli.
- Then, to clear away the revisions, type the following command: wp revisions clean
Restrict Revisions
Restricting how many revisions are stored per page or post is another effective method. Even a low number, such as 10, will prevent revisions from spiraling out of control — mainly if you make plenty of them.
You can use this code in your wp-config.php file to limit the number of revisions:
define('WP_POST_REVISIONS', 10);This code must be placed above the ‘ABSPATH’, or else it will not function. You can alter the quantity to any number of revisions you’d like to preserve in your database.
You can also limit revisions with a paid plugin such as Perfmatters.
Deactivate Revisions
Finally, you can turn off revisions entirely on your WordPress site. If you choose this approach, we strongly advise that you remove revisions first and then deactivate them. As a result, your database will be free of all previous revisions, and recent ones won’t be added in the future.
Insert this code to your wp-config.php file to deactivate revisions. The code must be placed above the ‘ABSPATH’ or else it will not work:
define(‘WP_POST_REVISIONS’, false);
You can also deactivate revisions using a plugin like Perfmatters.
Clear Away Autoloaded Data From the wp_options Table
When it comes to the overall performance of your site and database, the wp_options table is frequently disregarded. This might potentially cause sluggish query times on your site, particularly for older and larger ones, because of left behind autoloaded data from third-party themes and plugins.
The wp options table holds a variety of your WordPress site’s data, including the following:
- Site URL, home URL, default category, admin email, time format, posts per page, and the like
- Settings for themes, plugins, widgets
- Temporarily cached data
The fields (columns) in this table are as follows:
- option_name
- option_value
- option_id
- autoload (In terms of performance, this is the one we’re concerned with)
The autoload field in the wp_options database is one of the most critical aspects to grasp. This indicates a yes/no value (flag). This effectively affects whether the wp_load_alloptions() method loads it or not. Data that is automatically loaded on each of your site’s pages are known as autoloaded data. The same concept applies here as when we demonstrated how to prevent particular scripts from loading sitewide. The autoload parameter is defaulted to “yes” for developers, but this should not be the case for every plugin.
When the wp_options table has too much-autoloaded data, WordPress sites can have problems. This is usually caused by the following:
- A plugin is autoloading data when it should have been configured to “no.” A contact form plugin is an excellent illustration of this — is it necessary to load data on all pages or only the contact page?
- Although plugins and themes have been deleted from the WordPress website, their options remain in the wp_options table. This could lead to requests querying superfluous autoloaded data.
- Rather than using their own tables, theme and plugin developers are importing data into the wp_options table. There are reasons on both sides for this since many developers favor plugins that don’t produce additional tables. The wp_options table, on the other hand, wasn’t built to handle a large number of rows.
Autoloaded data should ideally be between 300 and 1MB in size. Some components can be optimized or omitted from being autoloaded as the file size reaches the 3-5 MB range or more. Anything heavier than 10 MB should be dealt with immediately. This does not necessarily imply that it will cause a problem, but it is an excellent starting point.
Clear Away Transient Records
WordPress saves transient records in the wp_options table unless you’re utilizing an object cache. These are usually given a time limit and should be removed eventually, but this isn’t always the case. We’ve seen databases with tens of thousands of outdated transient records in them.
It’s also worth noting that transients are not automatically loaded by default. To see if there is any autoloaded transient data, use a query like the one below:
SELECT *
FROM `wp_options`
WHERE `autoload` = 'yes'
AND `option_name` LIKE '%transient%'
Use a free plugin like Delete Expired Transients or Transient Cleaner to clear away only the outdated transients from your wp options table. It is a safer and better alternative.
However, WordPress now has a function that removes outdated transients, which was added in version 4.9. So ideally, that’s already working on your site.
WP Rocket’s database optimization features also include the capability to remove transients.
Clear Away WordPress Sessions
Another persistent problem we’ve noticed is that cron jobs might become out of sync or fail to run correctly, resulting in sessions not being cleared away. Your database may become clogged with _wp_session_ rows.
To see if you’re having this problem, try the query below:
SELECT *
FROM `wp_options`
WHERE `option_name`
LIKE ‘_wp_session_%’
You can safely remove these using the following command (like a cron job should have done).
DELETE FROM `wp_options`
WHERE `option_name` LIKE ‘_wp_session_%’
Add an Index to Autoload
If clearing away your wp options table wasn’t sufficient, consider making the autoload field an “index.” This, in turn, can aid in more efficient searching.
Use a Persistent Object Cache Like Redis
Redis is an in-memory data structure store that is free and open source. With Redis, cached objects can be recycled between page loads since it persistently stores the values created by the WordPress native object cache.
Utilizing a persistent object cache like Redis lets you recycle cached objects, rather than query the MySQL database twice for the same object. As a result, Redis can lessen the burden on a website’s MySQL database, while also improving the site’s capacity to scale and accommodate more traffic.
Highly dynamic websites that cannot benefit from page caching may benefit from a persistent object caching solution like Redis.

Speeding Up WordPress Search With Elasticsearch
Elasticsearch is an open-source full-text search engine used to index and search large amounts of data quickly. It can be used in WordPress to accelerate database queries. This is accomplished by first creating an index of your site’s database content and utilizing Elasticsearch to search that index faster than a MySQL query can.
A highly skilled developer can integrate Elasticsearch with a WordPress site if you have the resources and inclination. Suppose your site uses WP_Query regularly. In that case, Elasticsearch may be incorporated by installing the free plugin ElasticPress. It seamlessly interacts with the WP_Query object to generate query results using Elasticsearch instead of MySQL.
Elasticsearch can help any WordPress site that relies heavily on WP_Query. Websites that can take advantage of Elasticsearch include:
- Sites that rely heavily on search for navigation
- WooCommerce sites with a high number of orders that require site administrators to examine an order list regularly
- Any site with plenty of posts and experiencing unreasonably slow MySQL queries
Deactivate Database-Intensive Non-Essential Features
Deactivating non-essential plugins and database-intensive theme features can make a huge impact.
- Widgets and plugins that display popular or related posts are terrible. They frequently have a high volume of queries across the entire site.
- Avoid plugins for image optimization that use your server to compress images. Always choose an image optimization plugin that works on an external server to optimize your photos.
Manually identifying and designating related articles to each post decreases the query to practically zero and has no negative impact on your site’s speed. Although it requires more effort, it has the advantage of allowing you to select what you want your visitors to view.
You can do this by using the fantastic Advanced Custom Fields plugin and then assigning fields to different blog post categories. This will allow you to search for and designate relevant content to each of your blog entries.
Plugins that add a view or post counter to your website should likewise be avoided unless necessary. For instance, avoid plugins that display “792 posts” next to a user’s avatar in a forum posting, or “5,243 views” while listing forum posts. These counters will wreak havoc on your database if you have a lengthy discussion. Use counters sparingly and only when needed. This is also true for many social counters.
Make Use of a CDN
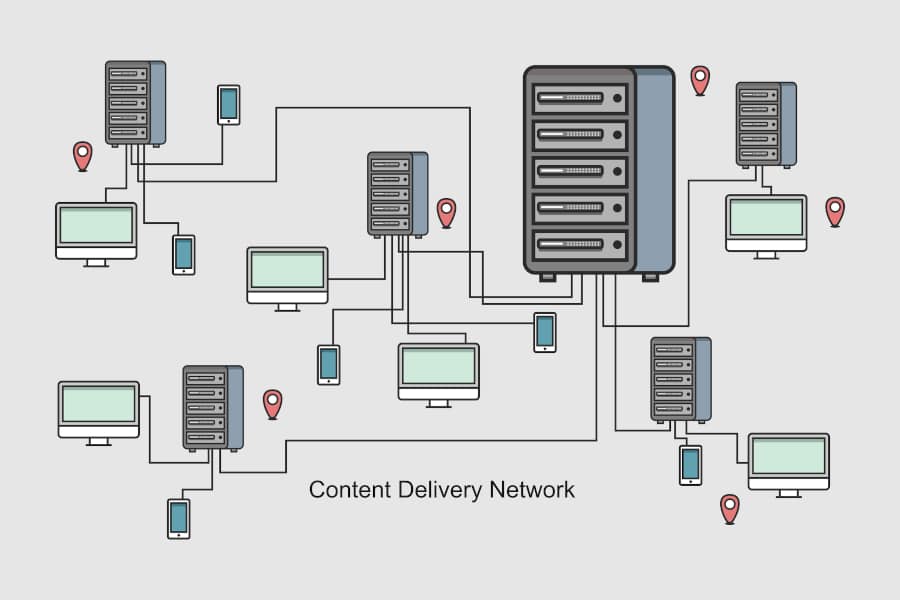
CDNs are a worldwide network of servers (sometimes referred to as points of presence or PoPs). They’re made to host and transmit static (or even dynamic) content, including images, JavaScript, CSS, and video streams from your WordPress site.
First and foremost, don’t confuse a CDN with your WordPress host. These are two distinct services. A CDN isn’t meant to take the role of your hosting provider; instead, it’s another approach to make your site faster.
How Does a CDN Operate?
A CDN maintains a cached version of your website’s content. It’s used in most geographic locations (or PoP) to reduce the distance between users and your website’s server. Each PoP has several cache servers that are in charge of delivering content to visitors in an area.
Essentially, a CDN distributes your content to multiple locations at the same time, giving your user better coverage. For instance, a local UK PoP is used when someone in London visits your US-hosted website. This is far more efficient than having the visitor’s inquiries and your responses travel the length of the Atlantic.
Types of CDNs
Content delivery networks can be divided into two categories:
Traditional Pull CDN
Traditional pull CDNs keep a copy of all your media and content in their cache; however, a client request is still issued straight to your hosting provider. Traditional CDNs include KeyCDN and CDN77.
Reverse Proxy CDN
A reverse proxy CDN differs from a traditional CDN in a few ways. While it still functions as a CDN, it intercepts all inbound queries and works as a middleman between the client and your server. Reverse proxy CDNs include Sucuri and Cloudflare. Hence, you should consider directing your DNS to these services rather than your host.
Since they function as a gateway server, they can provide robust web application firewalls, which can effectively prevent malicious traffic from ever reaching your WordPress site or hosting provider. One disadvantage is that, in comparison to a traditional CDN, they are a bit more costly. However, with the added security and performance capabilities, this may be minor.
Testing Site Performance With CDN
We already discussed the several advantages of WordPress caching. CDN caching, on the other hand, is also quite effective. Since CDNs often have a far more substantial number of server locations compared to hosting providers, they’ll be able to cache all your resources closer to your visitors and transmit them out at incredible speeds.
Here are some quick test results that demonstrate how much CDN can speed up a site’s performance. This series of evaluations takes the average of five Pingdom speed tests for a site with a server that is physically located at the Iowa, USA data center and accessed from London, United Kingdom.
Without CDN
- Latency: Without CDN, the total load time was 1.03 sec.
- TTFB: The average TTFB on resources without the CDN was roughly 98 ms.
With CDN
- Latency: With CDN enabled, the total load time is now 585 ms. This means that page load time was faster by 43.2%. Since the CDN maintains a London data center, all resources are cached from there and are ready to be supplied with the lowest possible latency.
- TTFB: The average TTFB on assets decreased to 15 ms after we enabled the CDN. As a result, adopting a CDN reduced our average TTFB by 84.69%. The reason for this is that the assets were directly transmitted from the CDN’s cache.
How To Enable a CDN
It’s not difficult to enable a CDN on your WordPress site. In fact, it’s straightforward! Take the following steps to do so.
- Choose a CDN provider and sign up for their service. These are usually priced monthly or according to data usage. Most services provide a calculator to determine the charges.
- Integrate traditional CDN to your WordPress site using free plugins (like CDN Enabler, Perfmatters, or WP Rocket). You don’t have to do anything to upload your content onto the CDN. It’s completely automated! Plugins are not usually required by reverse proxy CDNs, though they may provide additional functionality.
More Ways To Optimize With CDN
Here are some more CDN optimizations to consider.
- A ton of requests can be generated by gravatar if you have plenty of comments on your site. You can find them at secure.gravatar.com.
- You can use your CDN to host customized web fonts as well as Google fonts.
- Ensure your favicon is loaded from your CDN. Every request, no matter how minor, is essential!
Offload Email and Media
Anything that makes a request affects the performance of your site in some way. For websites that hold thousands of files or vast quantities of media, it might be a good idea to offload these resources entirely. Offloading is not the same as serving it over a CDN. The original data remains at your server when using a CDN. A CDN stores numerous copies of it.
When the cache on your CDN resources expires, it sends a request to your server for the most recent copy of the files. CDNs are designed to keep files cached for a long time. However, given their large number of POPs, there may be a great deal of re-querying as the cache expires in various locations.
Offloading media or files involves physically removing them from your host provider’s geographical location. As a result, while it may appear that your site provides the files, they are actually hosted elsewhere. Aside from minimizing the number of requests returned to the host, the most crucial purpose is to preserve storage space.
Use Amazon S3 for Offloading Media
Amazon S3 is among the most well-known offloading services. Amazon S3 is a storage system that is available through Amazon Web Services (AWS). This is commonly used for huge sites requiring extra backups or providing sizable files (software, downloads, videos, audio files, games, PDFs, and others). Amazon has a solid reputation of being extremely dependable, and its vast infrastructure allows them to provide budget-friendly storage fees. Airbnb, Netflix, Nasdaq, SmugMug, and other companies are among S3’s clients.
You can almost expect them to be less expensive than your WordPress server since they only handle bulk storage. Using AWS to offload media is a cost-effective approach to save money, and it’s free for the first year (storage capacity of up to 5 GB). Additionally, since your media requests are transmitted straight from Amazon, your WordPress site will experience less burden, resulting in speedier load times.
Use Google Cloud Storage for Offloading Media
Google Cloud Storage is another well-known offloading option. Google can offer incredibly low storage rates because of its significant infrastructure and the fact that they work with large-scale storage. Vimeo, Spotify, Evernote, Philips, Coca-Cola, and Motorola are among their clients.
Marketing and Transactional Emails Can Be Offloaded
Emails influence your server’s resources and performance. Misusing this on some hosts, particularly shared hosts, may result in your account being suspended. When sending bulk emails, this is very problematic. As such, many hosting providers refuse to allow email delivery on regular ports, and third-party transactional email services exist. Therefore, we suggest against sending emails from your hosting provider.
To get the highest output while delivering newsletters or batch emails, we usually suggest the following options:
- Use a professional email marketing platform that isn’t included with WordPress.
- Use WordPress in conjunction with a transactional email system (SMTP or HTTP API).
Using a third-party provider has several other benefits, such as:
- Improved email delivery. Allow email service providers to focus on what they do best.
- There’s a lower possibility of being suspended.
- Setting up DMARC records via your hosting provider may not always be feasible.
Email Marketing Tools
Product and feature updates, newsletters, promotions, onboarding reminders, and event invitations are all forms of email marketing. We suggest the following email marketing tools:
Transactional Email Services
Account creation alerts, purchase receipts from EDD or WooCommerce, shipment notifications, password resets, app error messages and the like are all instances of transactional emails. We suggest the following transaction email services:
The Bottom Line
There’s so much you can do to speed up your WordPress website. Our advanced techniques are effective and easy to follow. However, if you do not have the technical skills, consider hiring a web developer to help you with speed optimization. Website speed is important for your users and it’s also a ranking factor on search engines.


1 thought on “How To Speed Up Your WordPress Site – Advanced Techniques (Part 2)”
Great suggestions! I have installed Redis on my NGINX server with FastCGI, which is performing great. A day ago I installed elasticsearch. I had really been missing this very important part since after installing it I found elasticsearch offers a dual benefit. It marks a considerable difference in terms of searches and site speed both. I noticed a nice difference on my site. Other things I use include the mariadb database server and cloudfront cdn. At last, the results are terrific. Elasticsearch is clearly a lot better than the wordpress search.